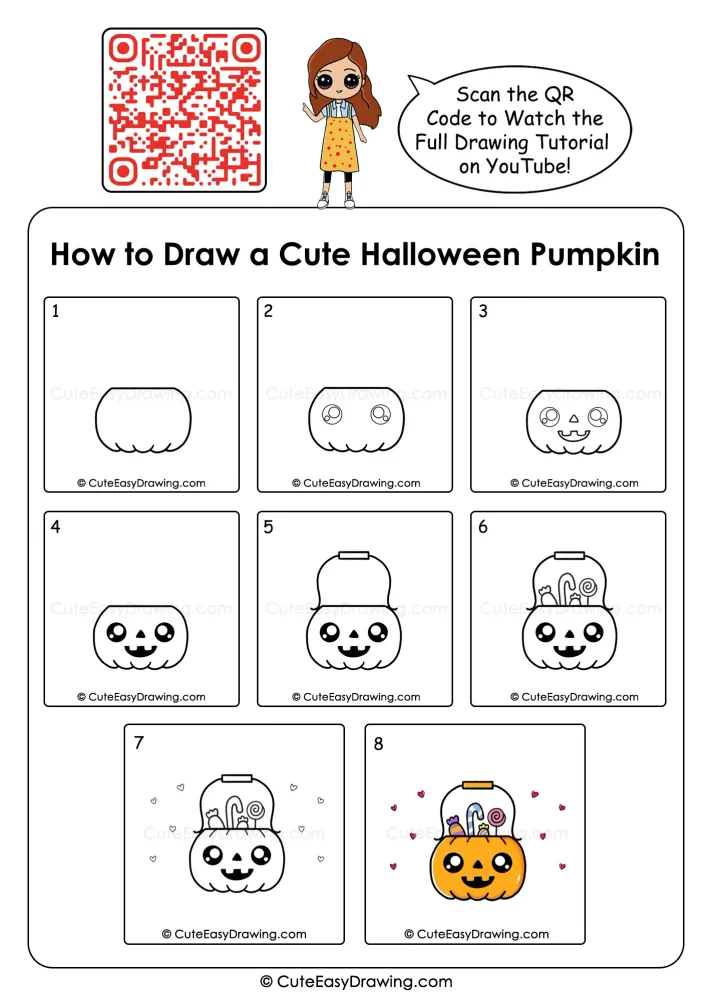
Halloween and pumpkins go hand in hand, making this season a fun opportunity for children to explore their creativity through art. Parents can encourage kids to strengthen their drawing skills by giving them simple seasonal projects that allow them to practice shapes, lines, expressions, and coloring. This cute Halloween pumpkin drawing tutorial is a great choice because each stage is easy to understand and simple for young artists to follow. With a pencil, some colors, and a little encouragement, children can enjoy creating their own cheerful Halloween pumpkin step by step.
What You’ll Learn in This Drawing
Why This Pumpkin Drawing Makes a Great Kids’ Activity
This tutorial has several qualities that can make drawing time easier and more enjoyable at home:
- The starting shape is manageable: Children begin with a simple rounded pumpkin form rather than a complicated character.
- The face comes together gradually: Eyes, nose, and mouth are introduced separately, allowing children to concentrate on one feature at a time.
- It introduces visual sequencing: Kids learn that a finished picture can be built by adding small elements in a planned order.
- The candy details encourage observation: The sweets have different shapes, giving children an opportunity to notice curves, stripes, and outlines.
- It works for different skill levels: Beginners can follow the reference closely, while more confident children can change colors or add their own decorations.
Simple Materials to Put on the Table
- Art Sheet — A smooth, clean surface for the pumpkin sketch.
- Graphite Pencil — For lightly building the main shapes and details.
- Correction Rubber — For gently removing unwanted marks.
- Outline Pen — For defining the finished drawing with clear lines.
- Coloring Tools — Use crayons, colored pencils, or sketch pens to complete the artwork.
Watch the Tutorial 🎥

You can watch the full pumpkin bucket drawing step by step tutorial on our YouTube channel to draw along easily with your child.
8 Easy Steps for a Cute Halloween Pumpkin Drawing
Stage 1: Start With the Pumpkin Body
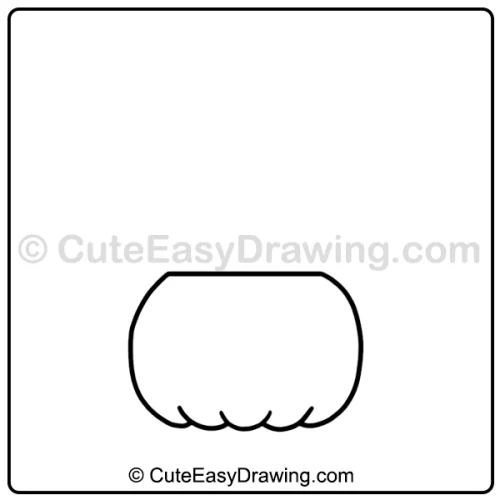
Begin this Halloween pumpkin drawing for kids with the main pumpkin shape shown in the first reference image. It has a broad, rounded upper section and a gently curved bottom with several soft bumps.
Encourage your child to concentrate on the overall silhouette instead of worrying about tiny details. The outline does not have to match this easy pumpkin drawing perfectly.
Stage 2: Place the Large Eyes
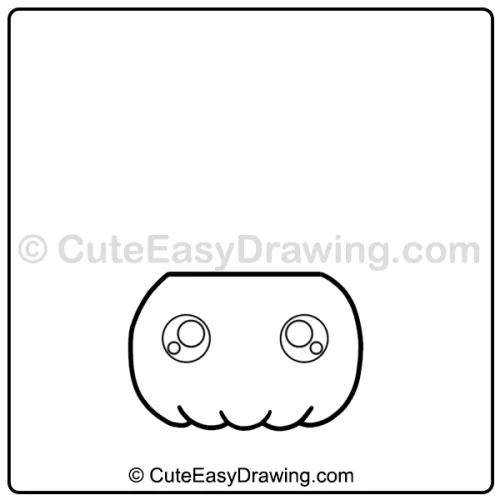
The next stage in this cute pumpkin drawing for beginners introduces two large circular eyes inside the pumpkin. Leave enough space between them so there is room for the nose and mouth later.
At this stage in this pumpkin bucket drawing, parents can remind children to check whether both eyes are roughly similar in size and height. They do not need to be mathematically identical.
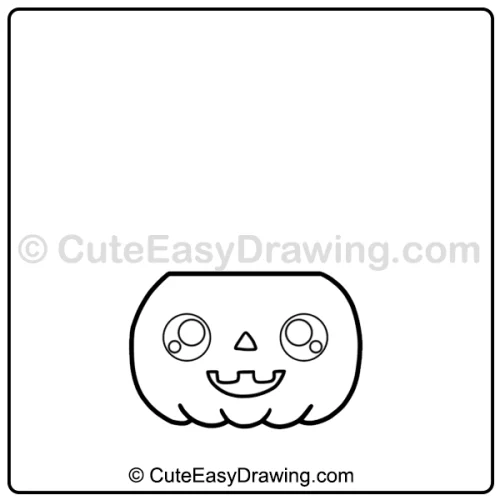
Stage 3: Shape the Pumpkin’s Expression
Now the pumpkin gets its personality. Add the small triangular nose and the smiling mouth shown in the reference.
The mouth has a playful shape with little tooth-like sections. This is a good opportunity to let children observe how a few simple marks can completely change the mood of a character.
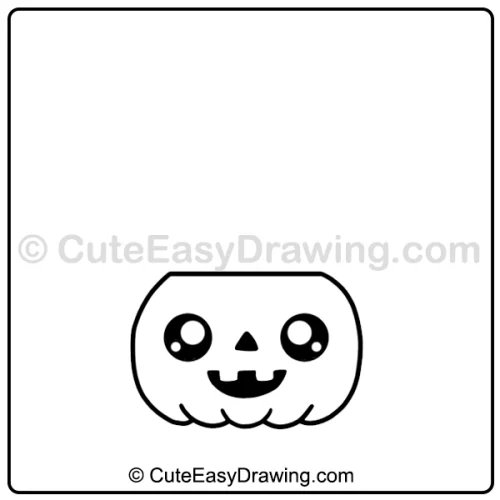
Stage 4: Strengthen the Facial Details
The fourth stage of this Halloween drawing for children makes the face much bolder. The pupils and mouth are filled with black, while the eye highlights remain white.
If your child is using a pencil first, this is a useful point to check the proportions before using a marker. Keeping the small white highlights visible helps the eyes retain their lively appearance.
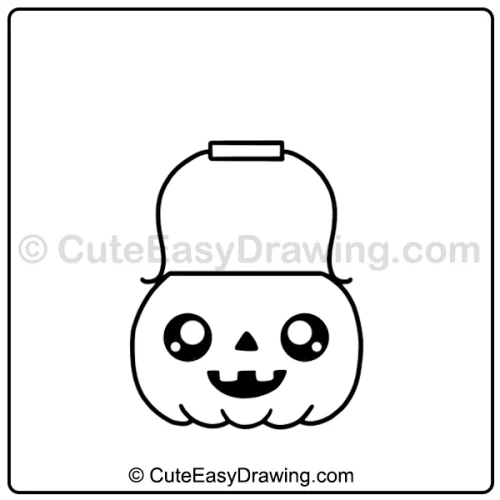
Stage 5: Build the Pumpkin Bucket
The candy pumpkin drawing now becomes a Halloween treat bucket. Add the raised section behind the pumpkin and the small rectangular tab at the top, following the fifth reference image.
This extra structure changes this picture from an ordinary pumpkin into a container ready to hold Halloween treats. Ask children to look carefully at where the new lines meet the existing pumpkin outline.
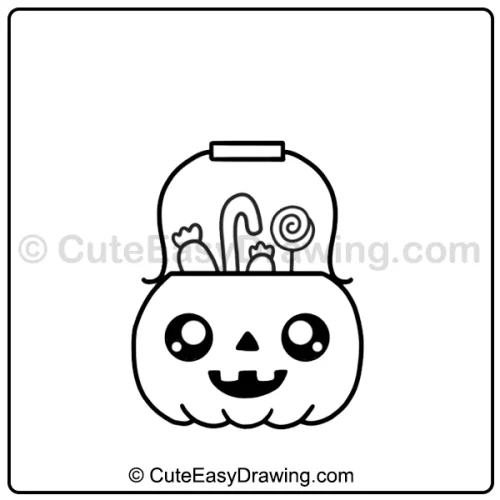
Stage 6: Fill the Top With Halloween Treats
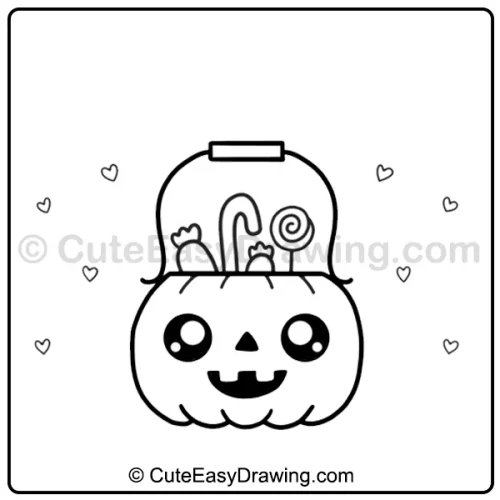
The sixth stage of this easy Halloween art for kids adds several sweets above the pumpkin. There is a candy cane-like treat, wrapped sweets, and a round lollipop.
Children can copy the shapes one at a time. Encourage them to notice that each sweet uses simple forms—curves, circles, short lines, and small decorative shapes—rather than complicated drawing techniques.
Stage 7: Add the Little Decorative Hearts
The seventh stage of this pumpkin drawing tutorial adds small hearts around the pumpkin. These decorations are separate from the main character, so children have more freedom with their placement.
They can make the hearts slightly different from one another. This is also a nice stage for practicing small, controlled movements with a pencil or sketch pen.
Stage 8: Complete the Pumpkin With Color
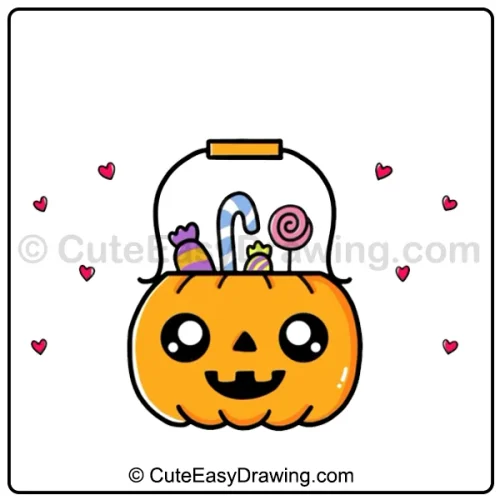
The final stage of this beginner Halloween drawing brings everything together. The pumpkin becomes bright orange, the top tab turns orange, and the candies receive different colors. The surrounding hearts are colored pink or red.
Invite your child to compare the finished picture with the earlier stages. They can see how the character developed from a few basic outlines into a complete Halloween treat bucket.
A Better Way for Parents to Guide Young Artists
Instead of correcting every line, try guiding the child through small observations.
- Use a “look, draw, check” rhythm – Ask the child to look at the reference for a few seconds, draw one part, and then compare it. This encourages independent observation.
- Break difficult shapes into movements – If a curve seems challenging, suggest drawing it slowly from one point to another rather than trying to complete it quickly.
- Let children pause between stages – There is no benefit in finishing all eight stages in one sitting. A short break can help a child return with fresh attention.
- Keep the pencil pressure light at first – Soft preliminary lines are easier to adjust than heavy marks. Once the child is satisfied, the important outlines can be strengthened.
- Treat coloring as another drawing skill – Ask children to stay inside larger areas first before attempting tiny candy details. This builds control without making coloring feel like a test.
A Cheerful Finish for Young Artists
When the last color has been added, take a moment to look at this finished Halloween drawing together. Point out how the drawing began with a simple outline and gradually gained a face, bucket details, candy, decorations, and color. The cute Halloween pumpkin drawing can become a small reminder that complicated-looking pictures are often made by combining simple steps.
FAQs ❓
1. How can parents make this drawing activity more engaging?
Parents can let children choose their own candy designs, facial expressions, and decorative elements. Asking children to explain what they are drawing can also make the activity more interactive and enjoyable.
2. What can children do if they struggle with the pumpkin’s curved outline?
Encourage them to draw the curve slowly in smaller sections instead of trying to complete it in one movement. They can also practice a few similar curves on a spare sheet before adding the line to their main drawing.
3. How can I prevent children from becoming frustrated?
Work in short stages and avoid correcting every difference from the reference. Encourage the child to complete one small part before moving on.
4. What can children do with the finished artwork?
It can be displayed on the refrigerator, added to a Halloween craft wall, used as a homemade card, or kept in a drawing folder to compare with future artwork.
5. Where can we watch the full tutorial?
You can watch the complete drawing tutorial on our YouTube channel.
Cute Easy Drawings – Learn Step-by-step

Free Coloring Pages for Your Inbox!
We’ll never spam you — just fun stuff for you and your little artist. Pinky promise.😊