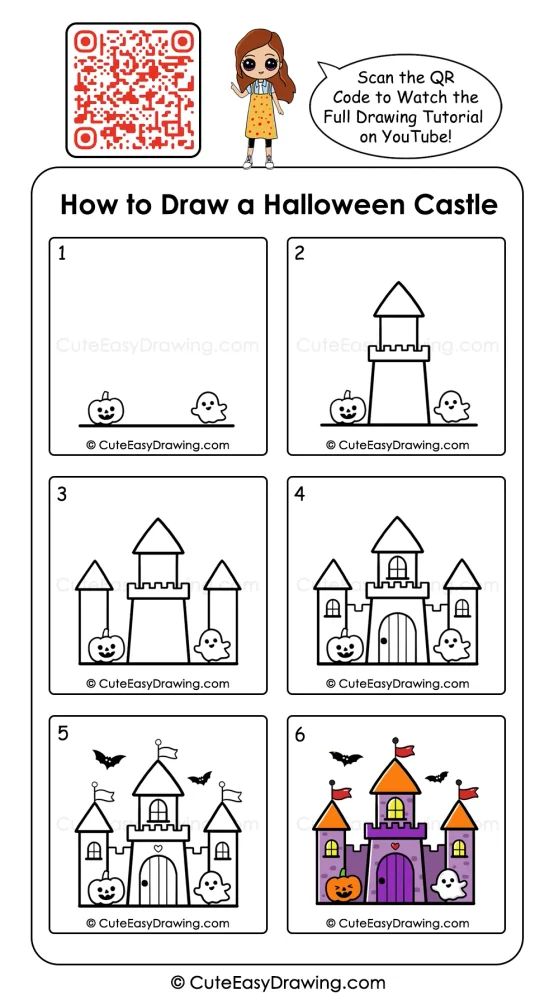
Ready to turn a few simple shapes into a playful Halloween scene? The Halloween castle drawing follows six clearly visible stages, so children can concentrate on one part at a time instead of trying to create the whole picture immediately. The finished scene has a cheerful spooky feeling rather than a frightening one. That makes it a fun choice for children who enjoy Halloween characters, castles, pumpkins, and imaginative pictures.
What You’ll Learn in This Drawing
Why Families May Enjoy This Halloween Castle Drawing Activity
- The picture grows gradually: Each stage adds a noticeable new part, making the progress easy to see.
- There are familiar Halloween elements: A pumpkin, ghost, bats, flags, and a castle create a recognizable seasonal scene.
- The shapes are visually clear: Towers, roofs, windows, and the large doorway are built from simple outlines.
- Children can see their progress: The small opening scene eventually becomes a complete castle illustration.
- It encourages visual organization: Young artists can observe how the central tower, side towers, and walls fit together.
Set Up Your Little Halloween Art Station
- 🖍️ Crayons, colored pencils, or sketch pens – Pick the coloring tools you enjoy using most.
- 📄 Drawing paper – Choose a clean sheet with enough room for the full castle.
- 🖊️ Black marker or sketch pen – Use it later to make the finished outlines stand out.
- ✏️ Pencil – Start with light strokes while building the castle shapes.
- 🧽 Eraser – Keep one nearby for tidying small lines or making corrections.
- 🪑 Comfortable drawing surface – Work on a steady, flat spot where your paper stays in place.
Watch the Tutorial 🎥

You can watch the full Halloween drawing for children step by step tutorial on our YouTube channel to draw along easily with your child.
Six Stages for a Spooky Castle Scene
Stage 1: Begin with the Pumpkin and Ghost
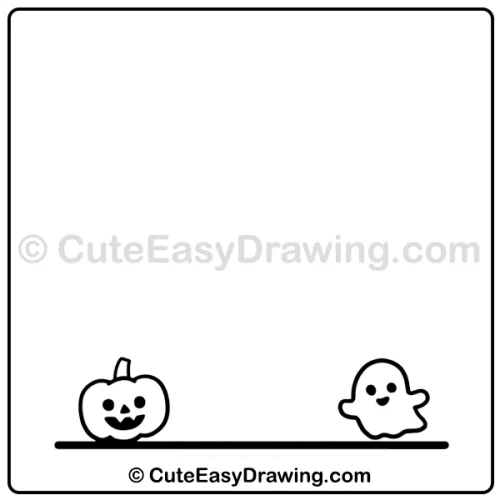
Start this Halloween castle drawing for kids with the two small Halloween characters at the bottom of the picture. Draw the pumpkin on the left with its short stem and cheerful face. Place the friendly ghost on the right.
Connect the characters with a simple horizontal ground line. Keep plenty of open space between them because the castle will be built in the middle of this Halloween castle art.
Stage 2: Build the Central Tower
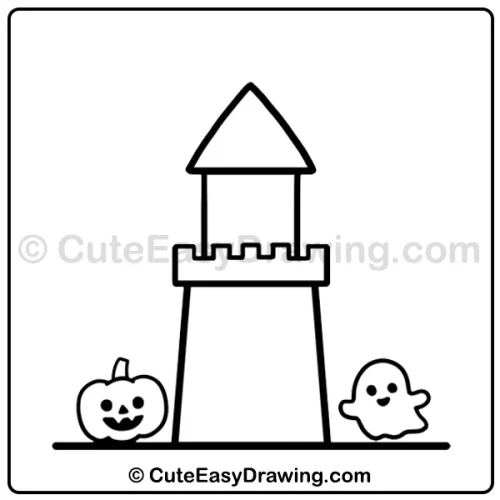
Use the open space between the pumpkin and ghost for the main castle tower. Draw the wide central tower body first in this cute Halloween castle.
Add the rectangular battlement section across its upper portion. Above that, create the taller tower with a pointed triangular roof.
At this stage, the castle is beginning to appear, while the pumpkin and ghost remain visible on either side.
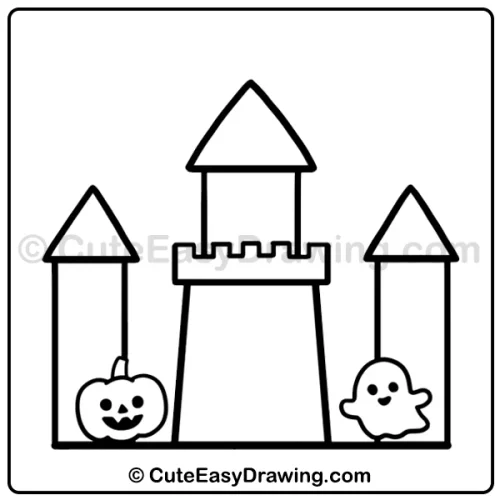
Stage 3: Add the Two Side Towers
Now give the castle more height and balance by adding a tower on each side of this spooky castle drawing. Draw the left and right towers so they sit slightly lower than the central tower. Give each one a pointed roof and connect the towers with the castle walls.
Keep the three towers visually balanced. The central tower should remain the main focal point in this haunted castle drawing for beginners.
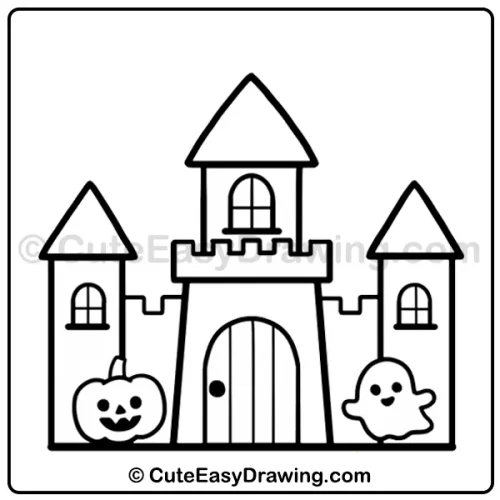
Stage 4: Add Windows, Walls, and the Main Entrance
This stage introduces the important architectural details to this easy castle drawing. Place an arched window inside the upper central tower.
Add smaller arched windows to the two side towers. Then create the large rounded doorway in the middle of the castle of this Halloween drawing for children.
Add the vertical lines inside the main door to give it a wooden-gate appearance. Small wall sections and battlements complete the castle structure.
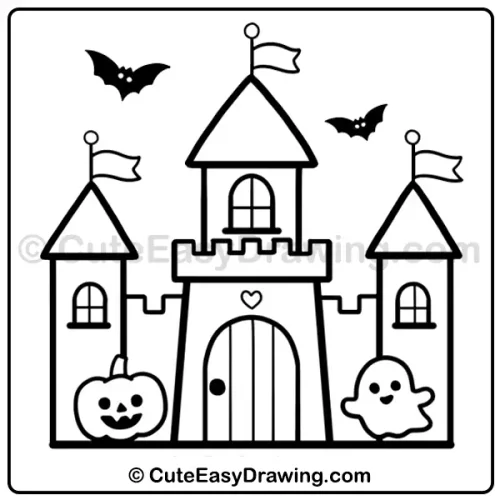
Stage 5: Decorate the Castle for Halloween
Now give the castle its Halloween personality. Add flagpoles and waving flags to the three tower roofs. Then place two flying bats in the open sky around the castle.
The pumpkin and ghost remain at the bottom of this pumpkin and ghost drawing, while the flags and bats make the upper part of the picture feel more lively.
A tiny heart-shaped detail can also be added above the main entrance, as shown in the finished line drawing.
This stage is also a good moment to check the outlines before moving on to color.
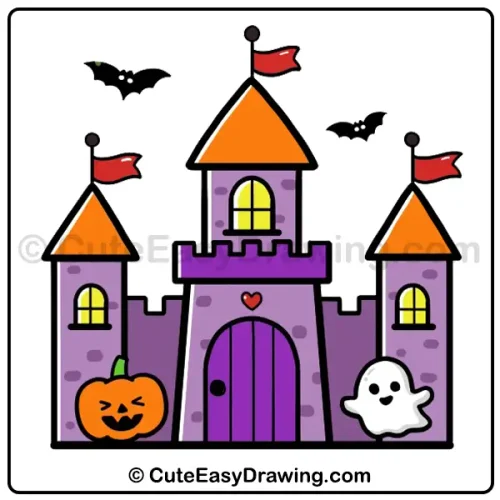
Stage 6: Bring the Picture to Life with Color
The final stage of this Halloween castle coloring transforms the outline into a colorful Halloween castle. Use orange for the pointed roofs and pumpkin.
Give the castle walls different purple shades. Color the windows yellow to create a warm glowing effect. Add red to the flags and the small heart.
Leave the ghost white and the bats black. Finish the outlines and small details carefully so the different sections remain easy to recognize.
Smart Drawing Moves for Young Artists
Instead of worrying about making every line perfect, encourage children to work in a calm and organized way:
- Look at the whole stage first: Before drawing, notice where the main shapes sit and how much space they occupy.
- Keep the middle open at the beginning: The first stage needs room for the large central tower that comes later.
- Build from large shapes to small details: Complete the towers and walls before concentrating on windows or decorations.
- Check both sides after adding a tower: Comparing the left and right sides can help keep the castle visually balanced.
- Keep tiny details neat: The flags, bats, heart, door lines, and facial features are small, so slower strokes can make them cleaner.
Wrap-Up: From Simple Shapes to a Festive Scene
A castle can look complicated when viewed as a finished picture, but breaking it into six visual stages makes the process much more approachable. Most importantly, the Halloween castle drawing gives young artists a chance to enjoy the process of building an entire seasonal scene one piece at a time. The finished picture can become a cheerful Halloween artwork to share with family.
FAQs ❓
1. Is this castle suitable for a beginner?
Yes. The picture is constructed gradually, beginning with a few simple elements and adding more architectural details in later stages. Beginners can concentrate on one stage before moving ahead.
2. Which part should a child draw most carefully?
The central castle structure is especially important because it forms the main body of the picture. Once its position and proportions are established, the side towers and decorative details can be added around it.
3. What makes the final stage different from the earlier stages?
The earlier stages concentrate mainly on construction and details. The last stage adds color to the castle, roofs, windows, flags, pumpkin, and other elements, giving the completed scene its Halloween appearance.
4. Can the pumpkin and ghost be drawn differently?
Yes. The tutorial shows a cheerful pumpkin and a friendly ghost, but children can give their own versions different facial expressions while keeping the general placement of the characters.
5. Where can we watch the full tutorial?
You can watch the complete drawing tutorial on our YouTube channel.
Cute Easy Drawings – Learn Step-by-step

Free Coloring Pages for Your Inbox!
We’ll never spam you — just fun stuff for you and your little artist. Pinky promise.😊