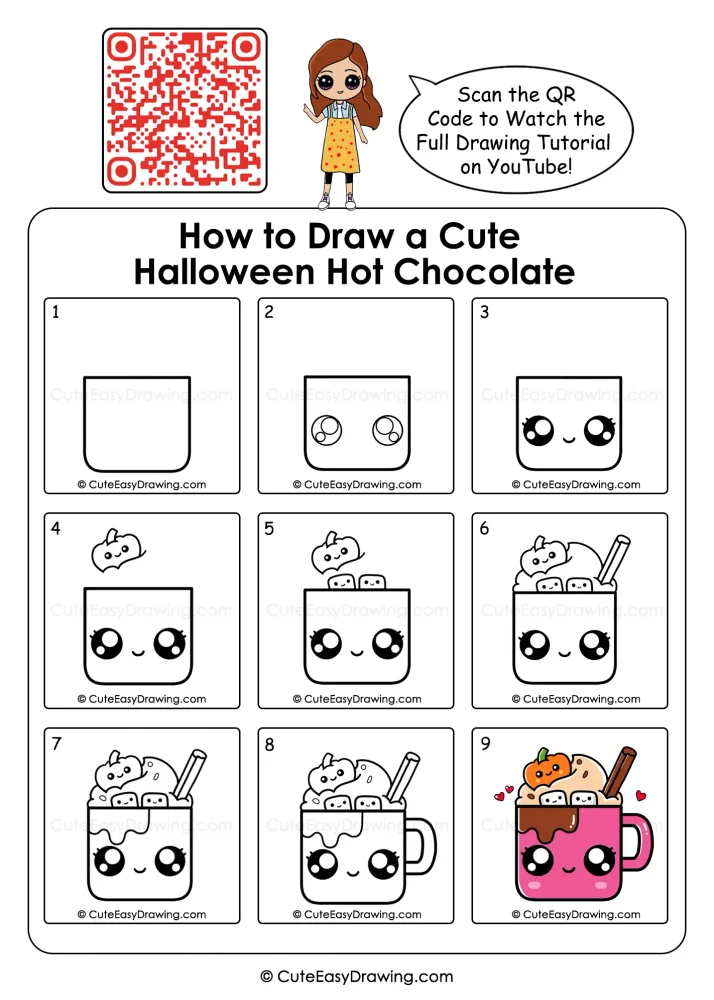
Looking for a fun art project to keep your child busy during Halloween? A cheerful hot chocolate mug decorated with a tiny pumpkin, fluffy cream, marshmallows, and a chocolate stick is a wonderful choice. This cute Halloween hot chocolate mug with its friendly face and colorful details make it an enjoyable subject for young artists. Using simple materials and a relaxed approach, children can enjoy making their own festive artwork at home.
What You’ll Learn in This Drawing
Why This Halloween Mug Is So Much Fun to Draw
- A Mug with a Little Halloween Magic: The smiling cup, tiny pumpkin, and fluffy toppings turn an everyday drink into a delightful seasonal character that children will enjoy creating.
- Learn to Draw by Spotting Shapes: The rounded cup, circular eyes, curved handle, and wavy chocolate drips help young artists understand how simple shapes combine to form an appealing picture.
- A Tasty-looking Lesson in Details: From the marshmallows to the chocolate stick, every topping introduces a new feature for children to observe and recreate with care.
- Create a Mini Halloween Masterpiece: Once the drawing is complete, children can proudly display it, use it on a handmade greeting card, or add it to their collection of seasonal artwork.
- Make Art Time Feel Like Playtime: Parents can join in by drawing their own mug character. Compare the funny faces and imaginative toppings rather than worrying about whose picture looks best.
Art Supplies for a Cozy Halloween Drawing Session
- Plain white drawing paper
- Graphite pencil
- Soft eraser
- Black marker or fine-tip pen
- Pink, brown, orange, green, cream, and black coloring pencils or sketch pens
- Optional crayons for soft coloring
Watch the Tutorial 🎥

You can watch the full step-by-step Halloween mug drawing tutorial on our YouTube channel to draw along easily with your child.
Cute Halloween Hot Chocolate Mug in 9 Fun Drawing Steps
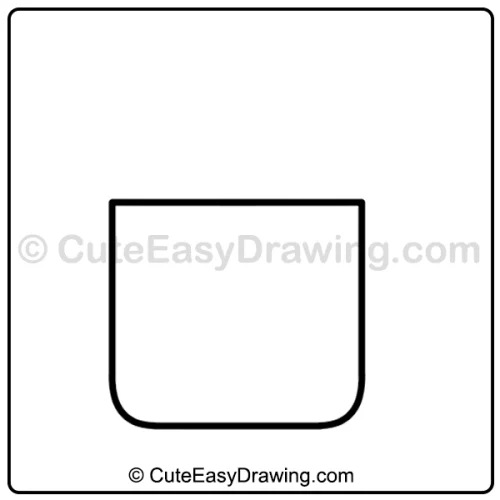
Step 1: Outline the Main Mug
At the beginning of this cute Halloween hot chocolate mug drawing, create a wide cup shape with a straight horizontal top, two short vertical sides, and a rounded bottom. Keep the top open so there is room for the toppings.
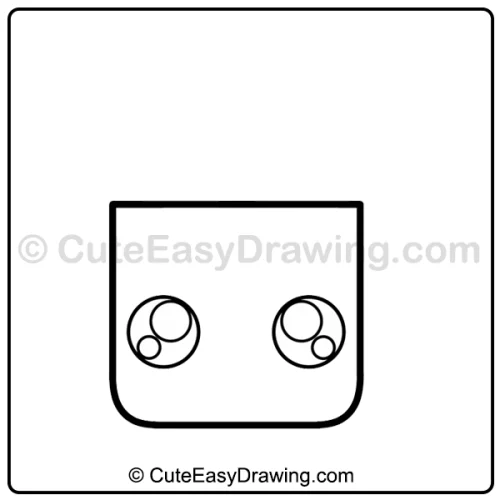
Step 2: Place Two Large Eyes
Next in this Halloween hot chocolate mug drawing for kids, draw two circular eyes inside the mug. Add a larger highlight circle and a smaller highlight circle inside each one. Leave enough space between the eyes for the mouth in this easy Halloween drawing for beginners.
Step 3: Give the Mug a Happy Expression
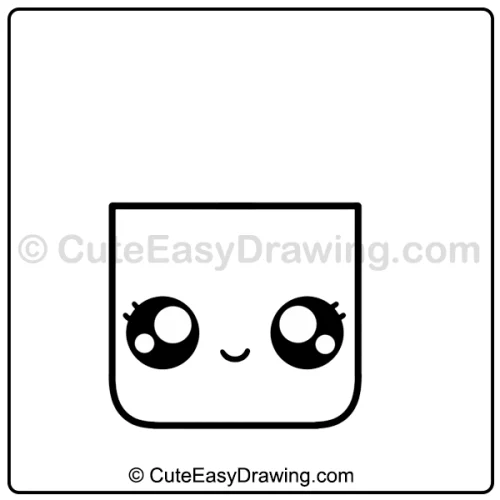
Fill the main eye areas of this easy Halloween mug drawing with black, leaving the highlights white. Add a few short eyelashes and a small curved smile to create a friendly expression in this kawaii Halloween hot chocolate mug.
Step 4: Sketch a Little Pumpkin Character
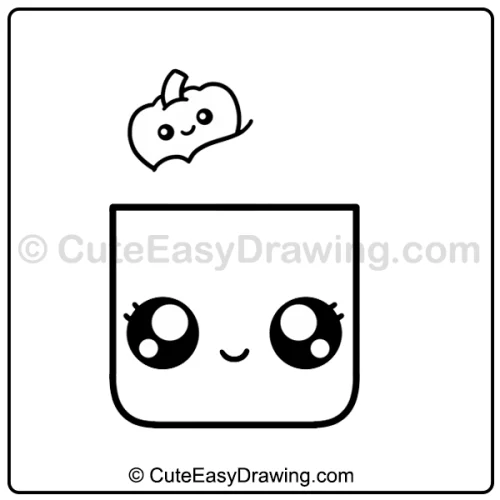
Above the left side of the mug in this Halloween hot chocolate cup drawing, draw a small pumpkin using rounded curves. Add a short stem, two tiny eyes, and a smiling mouth.
Step 5: Add Marshmallows
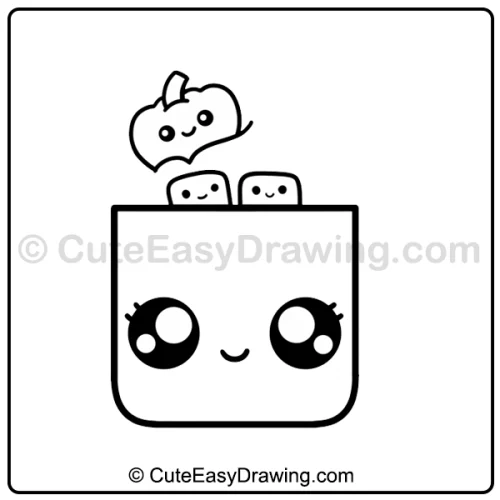
Draw two small, rounded rectangular marshmallows emerging from the top of the mug in this marshmallow hot cocoa mug art. Include tiny facial details to this cute hot cocoa mug illustration if you wish, and leave space for the other toppings.
Step 6: Build the Hot Chocolate Toppings
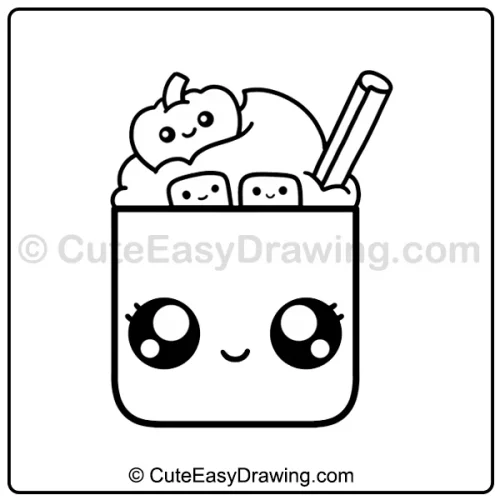
Draw fluffy whipped cream behind the pumpkin and marshmallows using connected curved lines next in this pumpkin hot chocolate mug drawing. Add a long, tilted chocolate stick on the right side, with parallel edges and a rounded top.
Step 7: Draw the Chocolate Drizzle
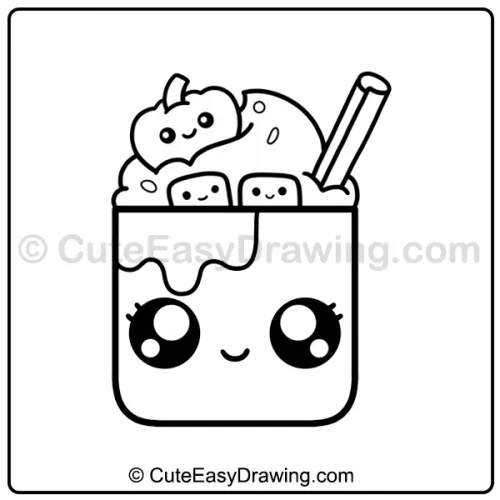
Create a wavy line across the front of the mug’s rim next in this cute Halloween drink drawing. Add several rounded drips to make the chocolate look as though it is flowing down the cup. Include a few small marks on the cream for extra detail.
Step 8: Complete the Mug Handle and Small Decorations
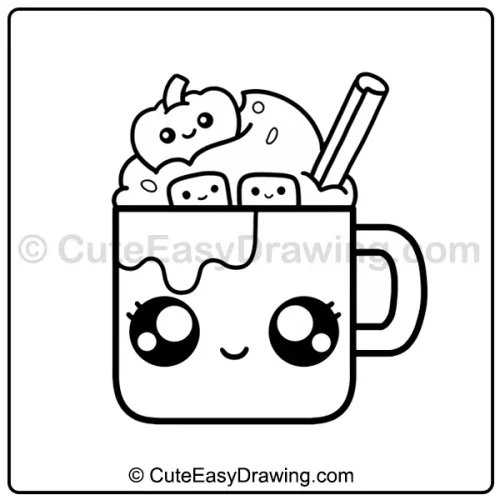
Now in this simple hot chocolate character drawing, draw a curved handle on the right side of the mug, using two connected outlines. Check that the toppings and handle look properly connected. Erase unnecessary pencil marks in this before outlining the picture.
Step 9: Color Your Halloween Hot Chocolate
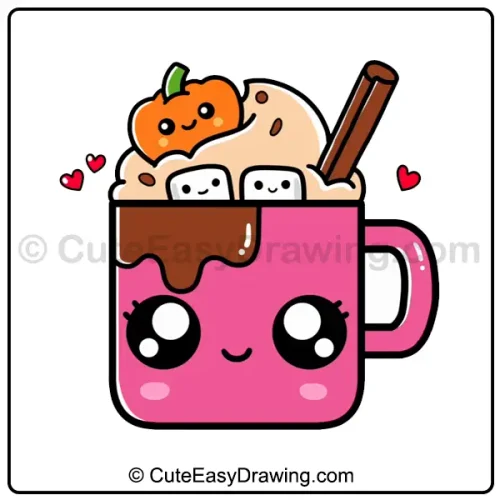
Color the mug pink, the chocolate topping and stick dark brown, and the pumpkin orange with a green stem. Use cream or light beige for the whipped topping. Keep the eye highlights white and add small pink cheek marks for a cute finishing touch.
Tips for a Smooth Halloween Drawing Adventure
- Break the activity into short sessions: If your child gets tired, finish the mug outline first and add the toppings later. There is no need to complete every stage in one sitting.
- Practice one tricky detail separately: If the handle or pumpkin looks difficult, let your child try drawing it in a spare corner of the paper before adding it to the main picture.
- Offer limited color choices: Place three or four coloring pencils on the table and let your child choose a combination. This can make color selection easier for children who feel overwhelmed by too many options.
- Ask observation questions: Try asking, “Which topping is behind the marshmallows?” or “Where does the chocolate drip?” These questions encourage children to study the picture carefully.
- Celebrate a personal improvement: Point out one specific achievement, such as a well-rounded mug, neatly placed eyes, or an interesting color combination. Meaningful encouragement helps children recognize their own progress.
Sip, Sketch, and Celebrate Your Halloween Art!
Every drawing gives children an opportunity to explore shapes, notice details, and make creative choices. Parents can make the experience more enjoyable by offering gentle guidance and allowing their children to work at a comfortable pace. The cute Halloween hot chocolate mug project is a playful way to bring Halloween inspiration into a child’s art time. Follow the illustrated stages together, experiment with colors, and let your young artist turn a simple mug into a character with its own personality.
FAQs ❓
1. How can children make the whipped cream look fluffy?
Encourage them to use a series of small, rounded curves instead of one straight line. Uneven curves can make the topping look soft and natural.
2. What is the easiest way to draw the chocolate drizzle?
Start with a horizontal line across the mug’s top edge, then add a few downward curves of different lengths. Keep the drips rounded rather than pointed.
3. Can this picture be used for a Halloween school project?
Yes. Children can use the finished illustration for an art assignment, a classroom display, or a homemade seasonal card, depending on the project’s requirements.
4. How can parents help children who become frustrated with small details?
Break the task into smaller sections and demonstrate only the part that feels difficult. Remind your child that the picture does not need to match the reference perfectly to be successful.
5. Where can we watch the full tutorial?
You can watch the complete drawing tutorial on our YouTube channel.
Cute Easy Drawings – Learn Step-by-step

Free Coloring Pages for Your Inbox!
We’ll never spam you — just fun stuff for you and your little artist. Pinky promise.😊