What if an ordinary notebook could become a funny little character with sparkling eyes and a cheeky smile? Children can explore this imaginative idea through a simple drawing activity that combines familiar shapes with playful cartoon features. This cute Labubu notebook drawing is a lovely way for parents to introduce young artists to character illustration at home. The goal is to enjoy the creative process and help every beginner feel comfortable putting pencil to paper.
What You’ll Learn in This Drawing
Why This Cute Notebook Drawing Is a Must-Try for Kids
- A playful twist on an everyday object: Children can transform a familiar school item into a character with its own personality.
- An introduction to facial expressions: The large eyes, tiny nose, and toothy smile help children explore how simple details influence a character’s appearance.
- A manageable drawing challenge: The design is built from recognizable shapes, allowing beginners to concentrate on one part at a time.
- A chance to practise decision-making: Children can choose their favorite colors, add decorations, and personalize the notebook cover.
- A shared activity for families: Parents and children can draw together, exchange ideas, and enjoy making their own versions.
Gather Your Creative Essentials
- Blank Drawing Sheet: Provides a clean surface for sketching the notebook character.
- Graphite Sketching Pencil: Helps create the initial shapes and facial details.
- Correction Eraser: Removes unwanted pencil marks and allows easy adjustments.
- Fine-Tip Black Pen: Adds neat, bold outlines to the completed illustration.
- Coloring Pencils or Wax Crayons: Bring the notebook cover, ears, and decorative details to life with bright colors.
Watch the Tutorial 🎥

You can watch the full Labubu notebook drawing for kids step by step tutorial on our YouTube channel to draw along easily with your child.
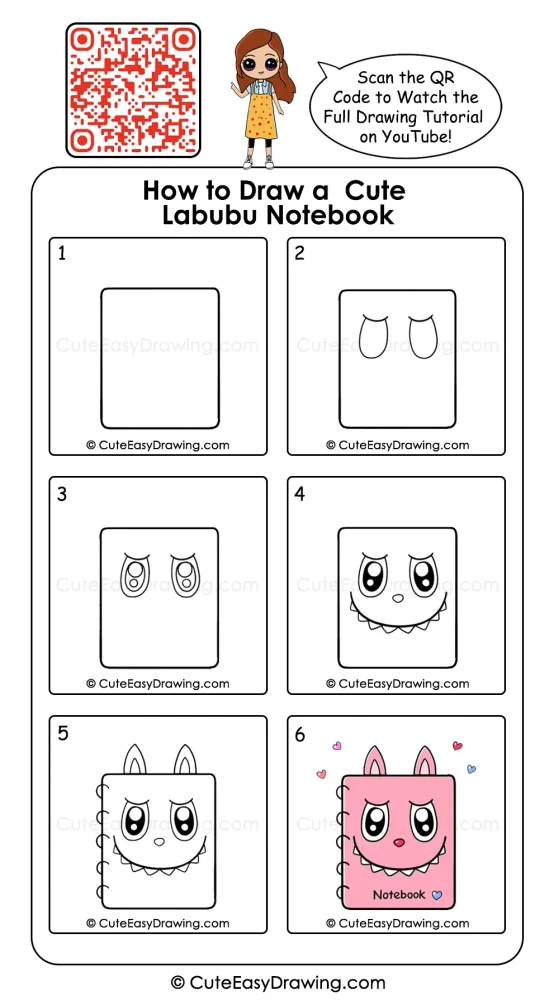
Create a Cute Labubu Notebook Drawing in 6 Simple Steps
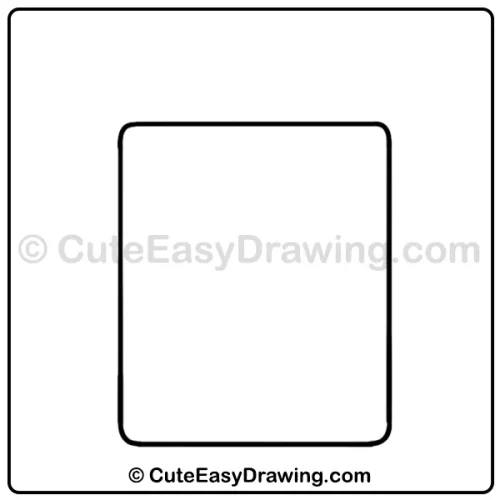
Step 1: Sketch the Notebook Cover
Begin this easy notebook character drawing with a tall rectangle with rounded corners. This shape will form the notebook cover, so leave enough space inside for the character’s face.
Helpful hint: Encourage your child to use light pencil strokes. A gentle outline is easier to adjust if the notebook looks too narrow or too wide.
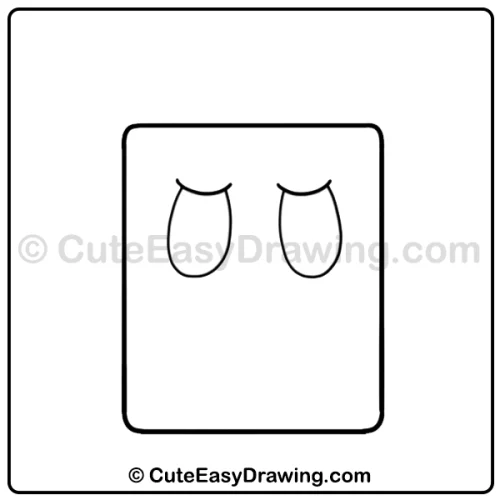
Step 2: Draw the Basic Eye Shapes
In the upper half of the kawaii notebook drawing, draw two upright oval shapes with a little space between them. Add a short, curved line above each oval to create the eyelids.
Helpful hint: Children can make two tiny guide marks before drawing the eyes. This helps them plan the placement instead of repeatedly erasing their work.
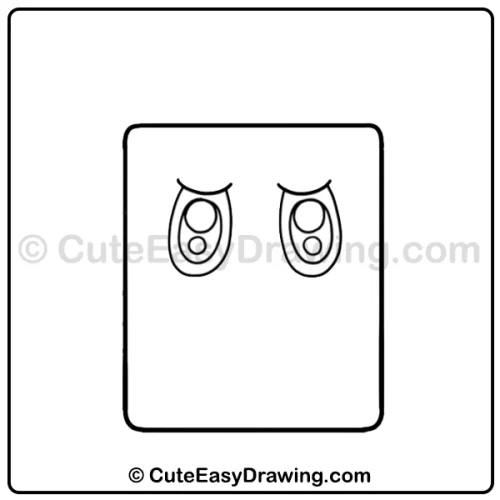
Step 3: Sketch the Eye Highlights
Inside each eye of this cartoon notebook drawing for beginners, draw two small oval shapes of different sizes. Place them near the upper part of each eye, leaving enough space around them.
Helpful hint: Encourage your child to draw the smaller and larger ovals gently without pressing the pencil too hard. This makes it easier to adjust their position and size if needed.
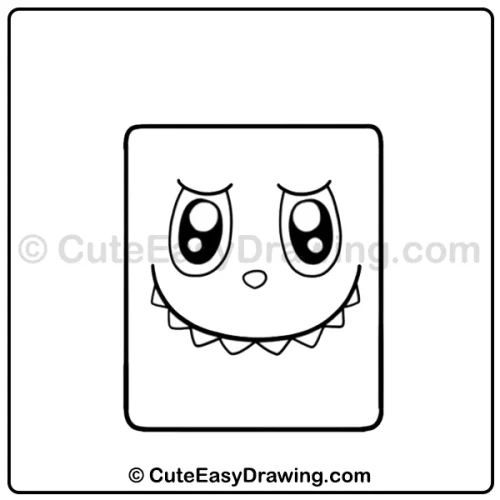
Step 4: Create the eyes, Nose and Toothy Smile
Carefully darken the remaining pupil area while leaving the highlight shapes white. Draw a small, rounded nose between the eyes.
Below it, sketch a wide curved line for the smile. Add a row of little triangular teeth along the mouth, following its curve to create the playful Labubu-inspired expression.
Helpful hint: Start with a few small teeth rather than trying to draw too many at once. Children can add more triangles as they become comfortable with the shape.
Step 5: Add Bunny Ears and Spiral Binding
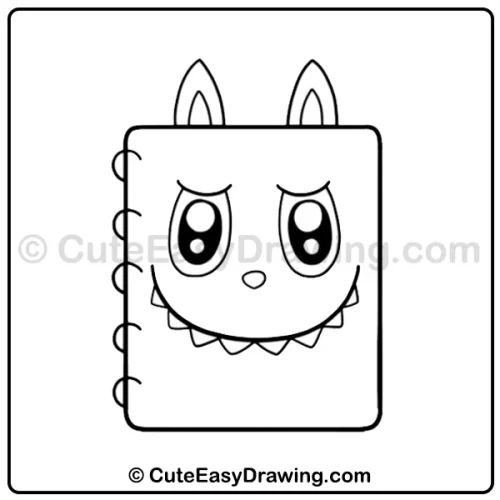
Draw two pointed ears behind the top of the notebook. Add smaller curved shapes inside them to show the inner ears. Next, draw several curved loops along the left edge to represent the notebook binding.
Helpful hint: Ask your child to count the binding loops while drawing them. This adds a simple counting game and encourages attention to spacing.
Step 6: Outline and Color the Finished Character
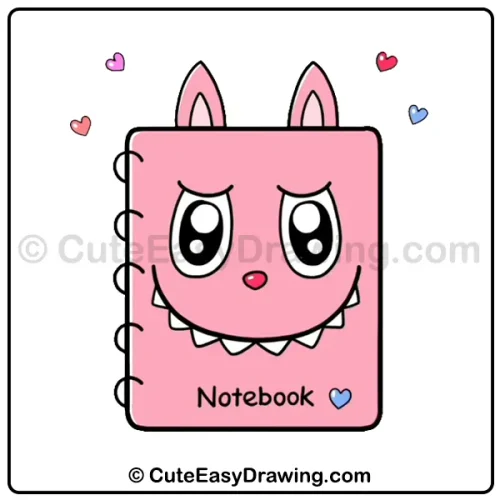
Trace the final drawing with a black marker and let the ink dry before erasing any remaining pencil marks. Color the notebook cover pink, use a softer pink inside the ears, and keep the teeth white.
Helpful hint: Allow your child to choose the final color combination. The notebook could be pink, purple, yellow, or even a rainbow design.
Creative Ways to Make Drawing Practice More Rewarding
Parents can introduce small activities that help children stay interested while developing their drawing skills.
- Make a shape-matching challenge: Invite your child to find the rectangles, ovals, circles, and triangles used in the character.
- Practise difficult details separately: Draw a few eyes or teeth on scrap paper before adding them to the main illustration.
- Create a color palette: Let your child select three or four colors before coloring begins, encouraging thoughtful color choices.
- Make a mini art gallery: Display several family members’ notebook drawings together and celebrate what makes each one different.
- Encourage a new character idea: After completing the notebook, ask your child to imagine another everyday object that could have a funny face.
Let Imagination Take Shape
Every little artist has a different way of bringing ideas to life. Let children explore various possibilities without worrying about making every detail perfect. Parents can make the experience even more special by encouraging children to create a collection of imaginative stationery characters. This cute Labubu notebook drawing is a delightful starting point for discovering new artistic ideas, enjoying creative moments, and building a lasting love for drawing.
FAQs ❓
1. Does my child need to know how to draw basic shapes first?
No formal drawing experience is necessary. Parents can demonstrate how to make a rounded rectangle and simple ovals before beginning, if needed.
2. How can I help my child avoid smudging the drawing?
Encourage children to keep their hands away from freshly colored areas and allow marker ink to dry before erasing pencil marks. Placing a clean sheet beneath the drawing hand can also help.
3. What is the easiest way to draw the spiral binding?
Use small, curved C-shaped lines along the left edge of the cover. Keeping the loops similar in size will help the binding look consistent.
4. Can my child make the character look happy or sleepy instead?
Yes. Changing the eyelids, eye shapes, or mouth can create different expressions. Children can experiment with these details once they understand the basic design.
5. Where can we watch the full tutorial?
You can watch the complete drawing tutorial on our YouTube channel.
Cute Easy Drawings – Learn Step-by-step

Free Coloring Pages for Your Inbox!
We’ll never spam you — just fun stuff for you and your little artist. Pinky promise.😊