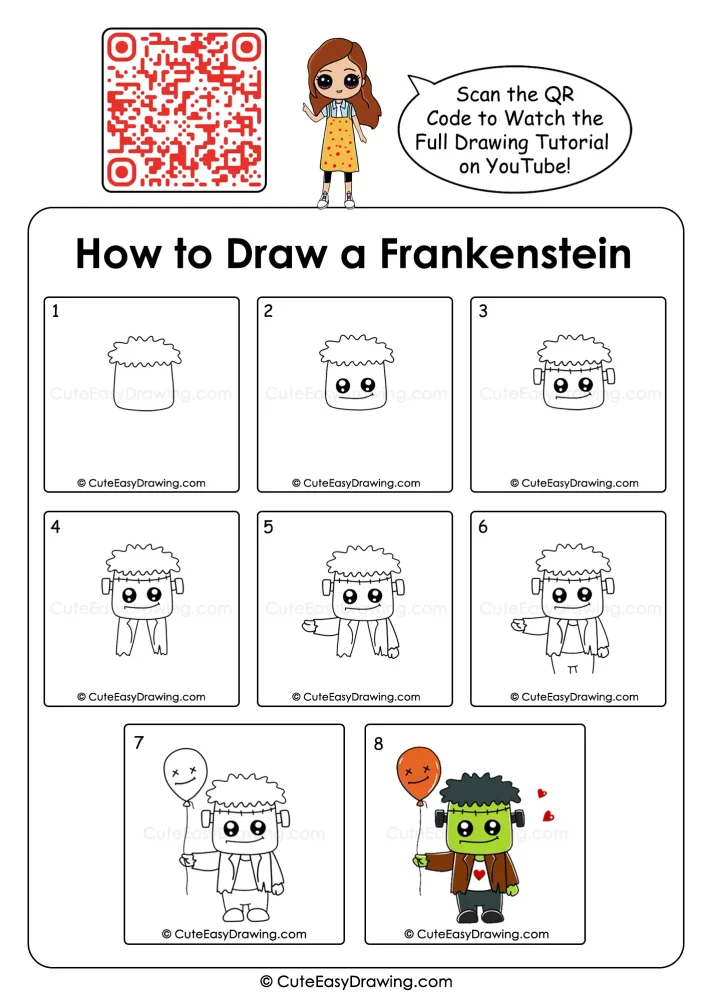
Halloween is a wonderful time for children to explore their artistic side, and a friendly little monster makes an exciting project to begin with! This cute Frankenstein drawing features a cheerful green face, messy dark hair, tiny stitches, a brown jacket, and an orange balloon with a funny expression. The simple shapes make the activity suitable for young artists who are just discovering the joy of drawing. Parents can use this guided activity to introduce children to character design without making the process feel like a classroom lesson.
What You’ll Learn in This Drawing
What Makes This Monster Art Project Worth Trying?
- A playful Halloween theme: The friendly monster brings seasonal excitement without making the picture too frightening for younger children.
- A gradual introduction to character design: Children discover how a face, hairstyle, clothing, and accessories work together to create a recognizable character.
- An opportunity to practice visual planning: Each stage adds another part, helping children understand how separate elements form a complete illustration.
- Great for creative bonding: Parents can join the activity and enjoy relaxed art time with their children.
- A shared parent-child activity: Adults can guide the tricky parts while allowing children to make their own artistic decisions.
Supplies for a Monster-Making Session
- Plain white drawing paper
- Black fine-tip marker for the final outlines
- HB pencil for the initial sketch
- Green, black, brown, orange, white, and red coloring tools
- Soft eraser for correcting small mistakes
- A ruler, if needed, to help with simple alignment
Crayons are a good choice for younger children, while colored pencils and sketch pens offer more control over smaller details.
Watch the Tutorial 🎥
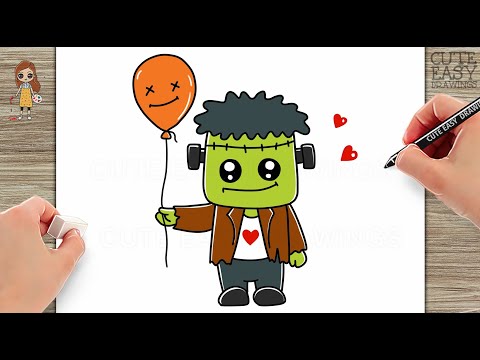
You can watch the full Frankenstein drawing step by step tutorial on our YouTube channel to draw along easily with your child.
Your Cute Frankenstein Drawing in 8 Simple Stages
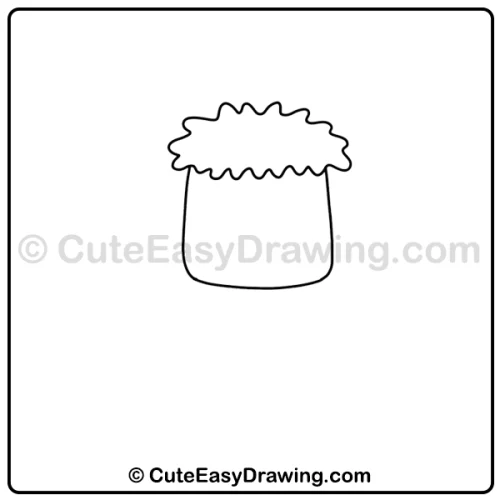
Step 1: Build the Head and Messy Hairstyle
Draw a broad, slightly rounded rectangle for Frankenstein’s head. Leave some space above for his hair.
Add messy hair using small bumps, waves, and pointed curves to create a fluffy, uneven hairstyle.
Parent’s Guidance: Ask your child to imagine a fluffy cloud with playful spikes to make drawing the hair easier.
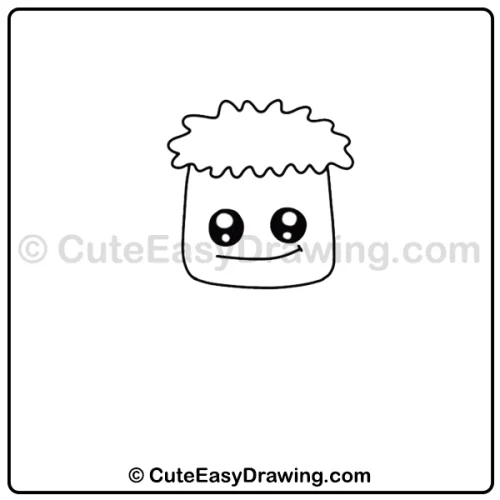
Step 2: Give the Monster Big Eyes and a Smile
Inside the head of this cute Halloween monster drawing, draw two large circular eyes, keeping a little space between them. Add smaller circles inside the eyes to create shiny highlights.
Fill the main eye shapes with black, leaving the highlights white. Draw a short, curved smile beneath the eyes.
Parent’s guidance: Help your child check that both eyes fit comfortably inside the face. They do not need to be perfectly identical to look appealing.
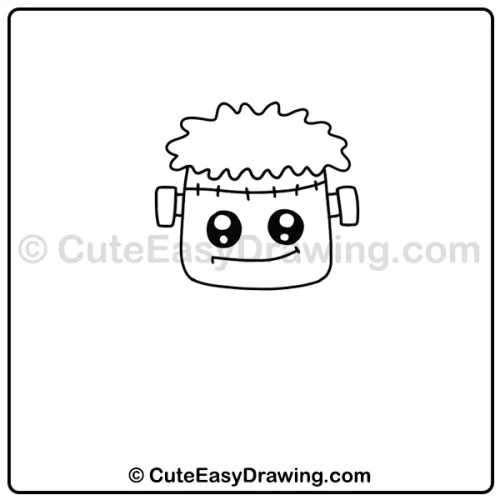
Step 3: Attach the Side Bolts and Add Stitches
Draw a small rectangular bolt on each side of the head of this Frankenstein drawing for beginners. Round the corners slightly so the pieces look comfortable and cartoon-like rather than sharp.
Then draw a horizontal line across the forehead, just below the hair. Add short vertical marks along the line to represent Frankenstein’s familiar stitches.
Parent’s guidance: Encourage children to make the stitches short and evenly spaced. A few simple marks are enough to communicate the idea.
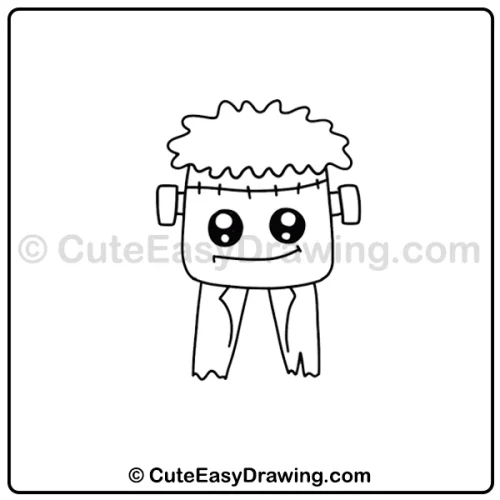
Step 4: Draw the Torn Jacket
Below the head, draw two narrow legs extending downward next in this cartoon Frankenstein drawing.
Add the jagged lower edges of the trousers with small zigzag shapes to give the clothing a playful, ragged appearance.
Parent’s guidance: If your child finds the zigzag edges difficult, begin with straight lines and add just two or three small notches to each trouser leg.
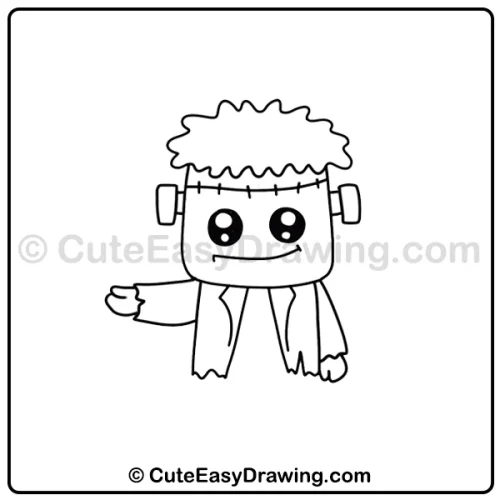
Step 5: Draw the Arms and Hands
Create the jacket by drawing two long, uneven panels on either side of the body. Extend one arm outward on the left, with a small hand pointing toward the side.
Next in this Frankenstein coloring drawing for kids, add the other arm beside the jacket.
Parent’s guidance: Draw the arms lightly before adding the final outline. This gives children a chance to adjust their positions without feeling that they have ruined the picture.
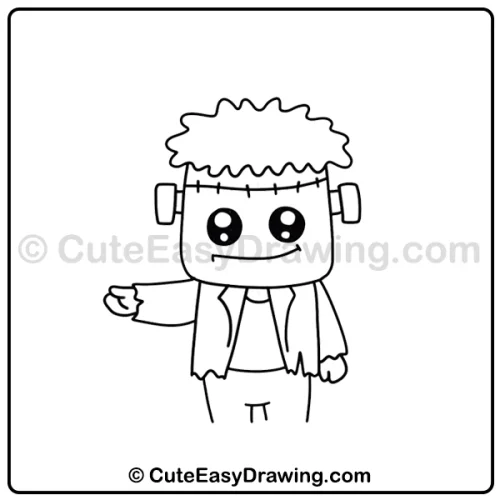
Step 6: Complete the Shirt and Clothing Details
Draw a small shirt beneath the head and between the jacket panels. Add a simple neckline and a few curved or angled lines to separate the clothing pieces.
Parent’s guidance: Invite your child to point out the jacket, shirt, and trousers before moving on. Identifying the different parts helps them understand how the character is assembled.
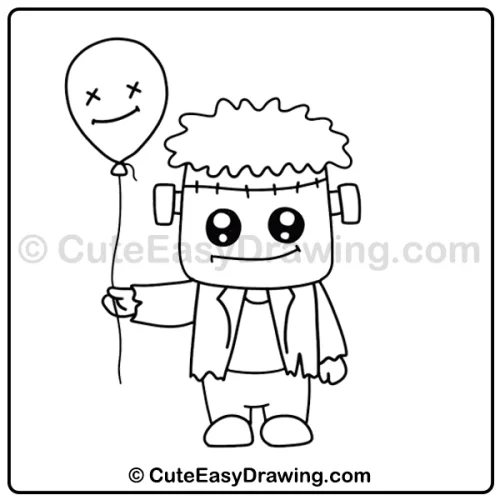
Step 7: Add Shoes and a Smiling Balloon
Next in this cute monster sketch for kids, draw two rounded shoes at the bottom of the legs. Draw curved tops and flat bottoms so the monster appears to stand firmly.
Beside the stretched hand, sketch an oval-shaped balloon with a small knot at the bottom.
Draw in this easy Halloween character art a thin string leading down toward the hand. Add two crossed eyes and a curved smile to the balloon.
Parent’s guidance: The balloon’s face is a chance for children to experiment. Let them decide whether it should look mischievous, sleepy, or extra cheerful.
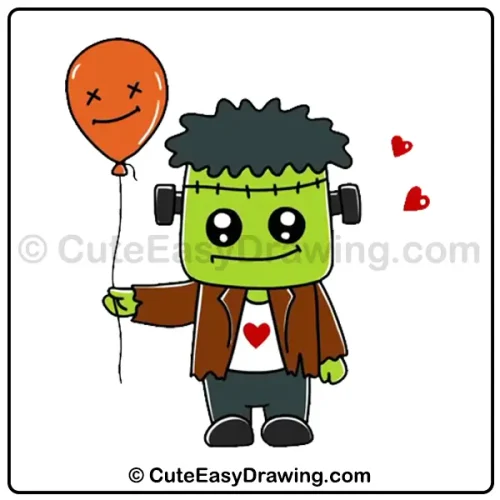
Step 8: Color the Character and Finish the Scene
Now it’s time to make your Frankenstein character burst with Halloween colors! Paint Frankenstein’s face bright green, his hair black, and his jacket brown. Keep his shirt white with a red heart and his trousers dark grey or blue-grey.
Color the balloon orange and add small red hearts beside the monster. Outline your drawing in black and let the ink dry before erasing any pencil marks.
Parent’s Guidance: Let children choose their own colors and enjoy creating their unique Frankenstein drawing.
Make the Drawing Experience Easier for Young Artists
Parents can make a big difference by helping children approach each stage calmly. Try these practical ideas during the activity.
- Use a drawing pause: After every two steps, stop for a moment and let your child compare the sketch with the reference image. This breaks the task into manageable portions.
- Offer shape clues instead of drawing for them: If a child struggles with the head, ask whether it resembles a square with rounded corners. Simple verbal clues encourage independent thinking.
- Keep a spare sheet nearby: Let children test their stitches, zigzags, or balloon expressions on another piece of paper before adding them to the main drawing.
- Practice one tricky feature separately: If the eyes are difficult, draw a few circles on scrap paper first. Repeating a small feature can feel less overwhelming than correcting the whole character.
- Give specific encouragement: Instead of saying only “good job,” mention a detail you noticed, such as the interesting hair shape or the careful spacing of the stitches.
A Happy Halloween Drawing to Be Proud Of
Completing a character drawing gives children a chance to see how small efforts gradually create a finished picture. Parents can make that experience more meaningful by celebrating the decisions, experiments, and new skills their children demonstrate along the way. This cute Frankenstein drawing is a cheerful way to introduce young artists to facial expressions, clothing details, simple accessories, and color choices.
FAQs ❓
1. What is a good way to introduce this project to a child who has never drawn a monster?
Begin by showing the finished character and pointing out its main parts: the head, hair, eyes, clothing, and balloon. Explain that each part will be added separately. This gives children a clear idea of what they are working toward.
2. How can parents help children who struggle to draw symmetrical features?
Encourage them to look at the face as two sides of the same space. They can lightly mark the approximate positions of the eyes before drawing the circles. Minor differences are perfectly fine in a cartoon character.
3. What can children do if the marker smudges the coloring?
Let the ink dry fully before erasing pencil marks or applying color. If a smudge occurs, avoid rubbing the paper repeatedly. A small correction or a creative detail may be enough to finish the picture neatly.
4. What should parents do if a child becomes frustrated with a particular step?
Pause and identify the specific part causing difficulty. Demonstrate the basic shape on scrap paper, then invite the child to try again independently. If needed, simplify the detail rather than asking them to repeat it until it looks perfect.
5. Where can we watch the full tutorial?
You can watch the complete drawing tutorial on our YouTube channel.
Cute Easy Drawings – Learn Step-by-step

Free Coloring Pages for Your Inbox!
We’ll never spam you — just fun stuff for you and your little artist. Pinky promise.😊