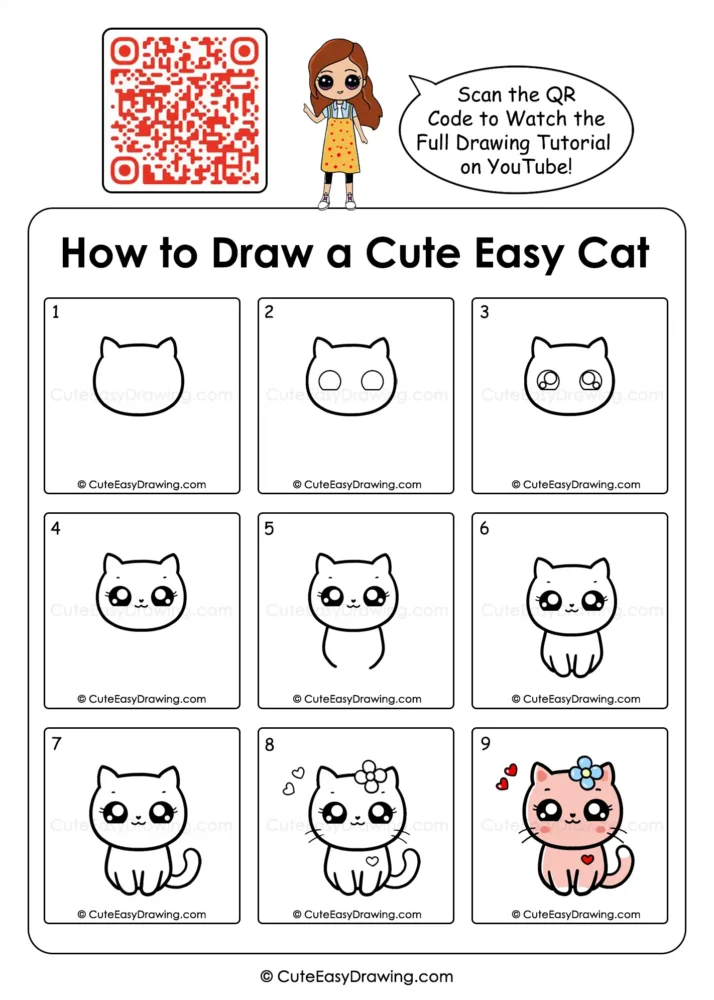
Ready for a fun art adventure with your little one? This step-by-step activity shows kids and beginners how to draw a cute cat using simple shapes, expressive eyes, tiny hearts, whiskers, a sweet flower, and a curled tail. With the video and visual steps as a guide, children can build their kitty one detail at a time and then add their own colors and creative touches to make the finished character truly their own.
What You’ll Learn in This Drawing
Why This Tutorial Works Well for Kids
Learning to draw a water bottle is a fantastic way to develop artistic skills while promoting positive habits. Here is why you should consider adding this to your drawing practice:
- A cheerful starting point: The cute kitty design makes the activity inviting for children from the very beginning.
- A confidence-boosting activity: Completing each part gives young artists a small win and motivates them to finish the picture.
- Room for imagination: Children can give their cat a new personality by changing its colors, expression, or little details.
- Great for creative bonding: Parents can join the activity and enjoy relaxed art time with their children.
- A fun way to explore art: The finished kitty gives kids a chance to experiment with shapes, patterns, colors, and character ideas.
What to Prepare Before Starting
Keep the workspace simple so the child can concentrate on the drawing rather than searching for supplies.
- Drawing paper or a sketchbook
- HB or similar pencil
- Clean eraser
- Black marker or fine liner
- Colored pencils, crayons, or sketch pens
Watch the Tutorial 🎥

You can watch the full cat drawing step by step tutorial on our YouTube channel to draw along easily with your child.
9 Stages for Building the Character
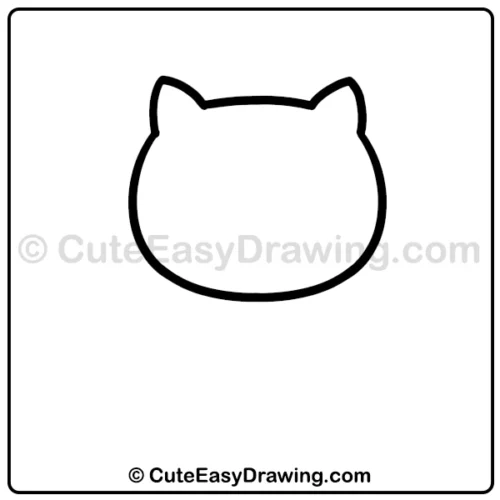
Step 1: Shape the Cat’s Head
Start this cute cat drawing for kids with the most recognizable part of the character—the head. Follow the reference and create a rounded outline with two pointed ears at the top. Keep the curves smooth and avoid pressing too hard with the pencil.
The head does not need to be perfectly symmetrical. Small differences can make a child’s drawing feel personal and lively.
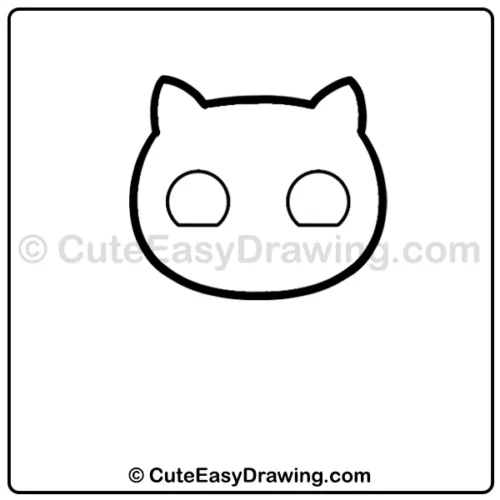
Step 2: Set Up the Eye Areas
Place two rounded shapes inside the face for the eyes next in this easy cat drawing. Try to keep them at a similar height and leave enough space between them for the nose and mouth.
At this stage of this cute kitten drawing, the face may look very simple. That is exactly what you want because the next details will gradually give it personality.
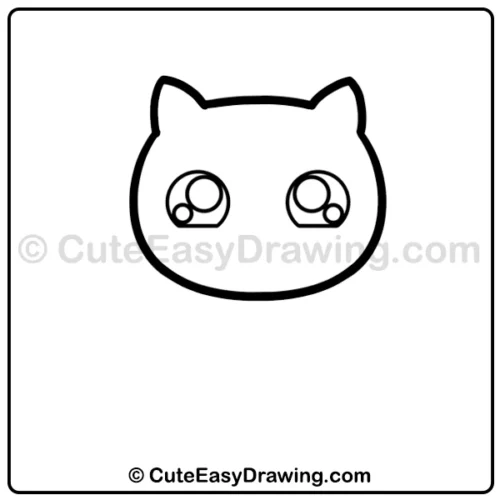
Step 3: Build the Sparkling Eyes
Add the inner shapes that create the oversized, shiny appearance of the eyes. Use large dark areas with bright circular highlights.
Encourage children to observe the position of the highlights carefully. This small detail in this easy drawing for kids makes a major difference to the character’s expression.
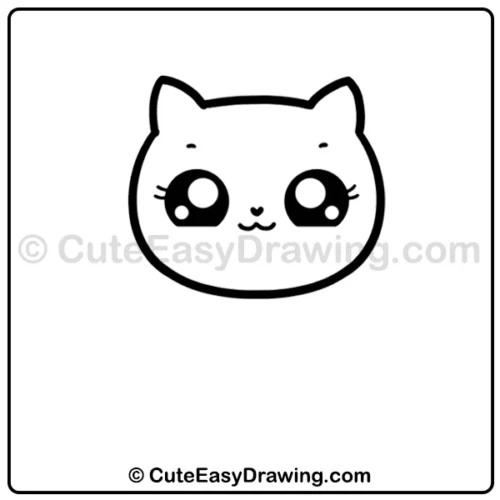
Step 4: Create a Charming Cat Face
Next in this beginner cat drawing add the tiny eyebrows, heart-shaped nose, curved mouth, and eyelashes. This is the moment when the character begins to look friendly and expressive.
Children can also change the mouth slightly if they want their cat to look happy, curious, or playful.
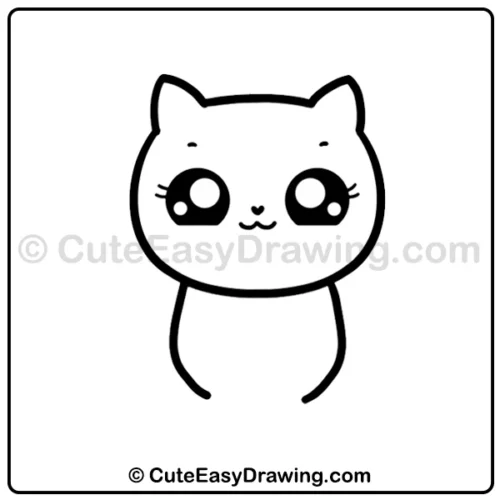
Step 5: Extend the Body Below the Head
Continue downward from the head and create the rounded body. Keep the shape soft and compact to match the cute proportions shown in the reference.
Do not worry about making every curve identical. The goal of this cat drawing tutorial is to create a comfortable shape that connects naturally with the head.
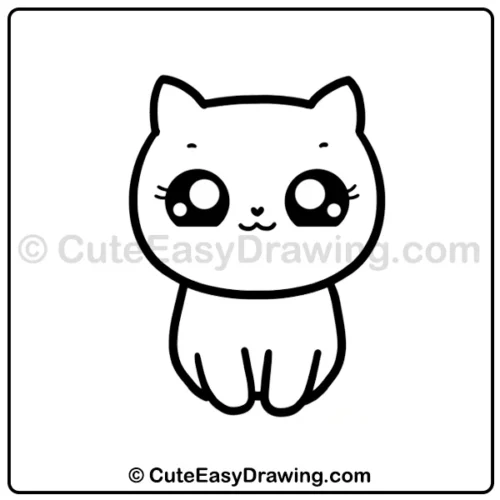
Step 6: Form the Little Paws
Add the front paws and separate the toes with curved lines. Make the paws short and rounded to keep the character looking soft and child-friendly.
Use gentle pencil strokes here. If a paw looks uneven, simply erase that section and try again.
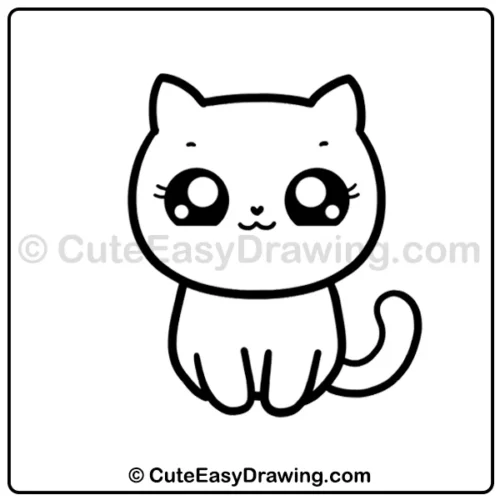
Step 7: Curl in the Tail
Draw the tail beside the body and give it a playful upward curve. The rounded tail balances this cute animal drawing and adds movement to the otherwise front-facing pose.
Leave a little breathing space around the tail so it does not visually merge with the body.
Step 8: Add the Sweet Decorative Details
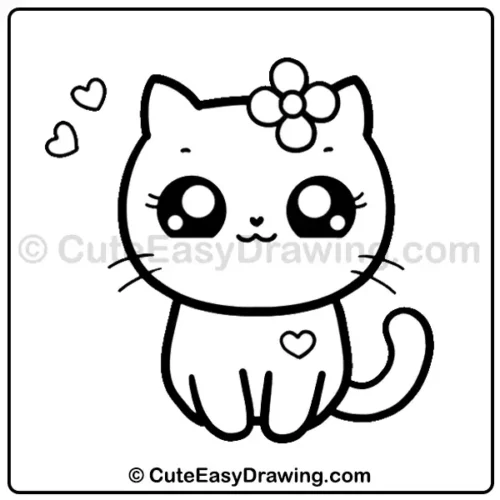
Now bring in the finishing illustrations: whiskers on both sides of the cheeks, the flower above the head, small hearts, and the heart-shaped detail on the body.
Kids can also replace them with stars, bows, clouds, butterflies, or other tiny designs.
Step 9: Turn the Outline into a Finished Character
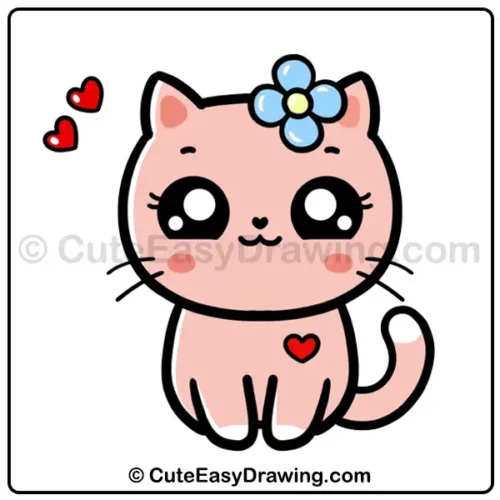
Once all the lines are complete, add color to this cat drawing for beginners. Use soft pink for body, darker pink inner-ear and cheek details, blue for flower petals, a yellow flower center, and red hearts. The eyes remain strongly contrasted with black and white highlights.
Encourage children to choose their own palette rather than feeling that they must match the example exactly.
Simple Tips for a Better Drawing Experience
- Observe before sketching: Encourage children to study each stage briefly before putting pencil to paper.
- Practice tricky lines first: Let beginners rehearse curved or rounded strokes on a spare sheet before starting the main drawing.
- Avoid correcting every detail: Give children freedom to keep small imperfections and discover their own drawing style.
- Make coloring part of the fun: Let kids choose a color theme and decide how they want their kitty to look.
- Celebrate the finished picture: Compare the first few lines with the completed character so children can see their progress.
Time to Celebrate
By the end of the activity, simple shapes have come together to create a charming character full of personality. When children draw a cute cat, they can experiment with colors, expressions, and details while building confidence through each stage. Whether their kitty matches the example or has its own unique style, every finished drawing is a fun reflection of their creativity and imagination.
FAQs ❓
1. Should children use a pencil or marker first?
A pencil is usually a comfortable starting point because it allows adjustments. Once the child is satisfied with the shapes, the main lines can be traced with a marker or fine liner.
2. What if the two eyes are not exactly the same?
That is completely fine. Slight differences are natural in hand-drawn artwork. If symmetry is important to the child, they can lightly mark the center of the face before positioning the eyes.
3. Can the flower be changed?
Absolutely. The flower is a decorative element, so children can replace it with a bow, crown, star, leaf, or another accessory.
4. How can beginners avoid making the drawing too small?
Encourage them to use most of the central area of the paper. Starting with a larger head shape also leaves enough room for the eyes, nose, whiskers, and other facial details.
5. Where can we watch the full tutorial?
You can watch the complete drawing tutorial on our YouTube channel.
Cute Easy Drawings – Learn Step-by-step

Free Coloring Pages for Your Inbox!
We’ll never spam you — just fun stuff for you and your little artist. Pinky promise.😊